.webp)
.webp)
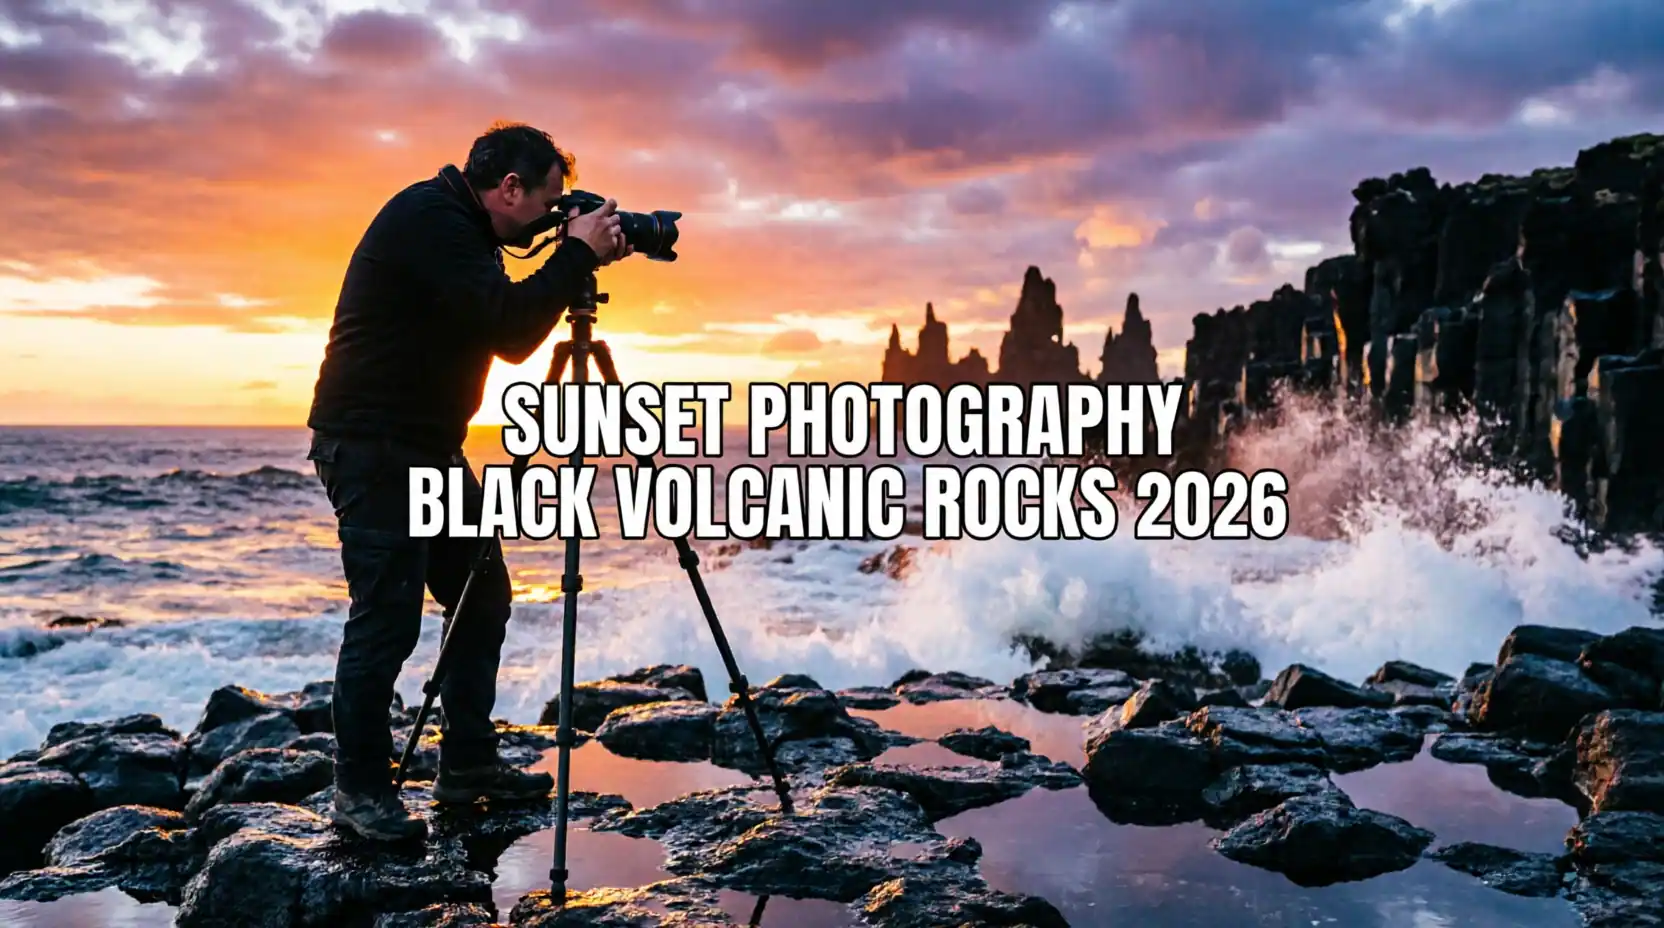
Photography Tips for Capturing the Sunset Over Black Rocks Volcanic Formations: Complete 2026 Guide
Introduction to Photographing Sunsets Over Black Volcanic Rock Formations
Capturing the dramatic interplay between fiery sunset skies and dark volcanic rock formations represents one of landscape photography's most compelling challenges and rewarding subjects. Black volcanic rocks, formed from ancient lava flows and shaped by millennia of weathering, create striking silhouettes and textures that contrast magnificently with the warm hues of golden hour and sunset light. From Iceland's Reynisfjara beach to Hawaii's volcanic coastlines, from New Zealand's rugged shores to the Canary Islands' dramatic landscapes, these geological wonders offer photographers endless opportunities for creating stunning imagery.
The unique characteristics of black volcanic formations—their deep dark tones, interesting textures, jagged shapes, and often dramatic coastal settings—present both opportunities and challenges for sunset photography. The extreme contrast between dark rocks and bright skies requires careful exposure management, while the constantly changing light demands quick adaptation and technical proficiency. Success in this genre requires understanding not only camera settings and composition principles but also the behavior of light during golden hour, tidal patterns for coastal locations, and safety considerations when working on potentially hazardous volcanic terrain.
This comprehensive guide provides expert photography tips specifically tailored for capturing sunsets over black volcanic rock formations. Whether you are photographing the famous basalt columns of Reynisfjara, the rugged lava fields of Iceland, or any similar volcanic landscape, these techniques will help you create compelling images that showcase the dramatic beauty of these geological formations bathed in the warm glow of sunset light.
Understanding Black Volcanic Rock Formations and Their Photographic Potential

Black volcanic rocks, primarily basalt, form when lava cools rapidly upon contact with air or water. This rapid cooling creates the characteristic dark color and often interesting crystalline structures or columnar formations. These rocks appear in various forms including smooth pahoehoe flows, rough aa lava, dramatic columnar basalt formations, and weathered coastal outcrops shaped by wave action over thousands of years.
From a photographic perspective, black volcanic formations offer several unique advantages. Their dark tones create natural silhouettes against colorful skies, their textures add visual interest and depth to compositions, and their often dramatic shapes provide strong foreground elements that anchor landscape images. The contrast between the black rocks and warm sunset colors creates naturally striking images that require minimal post-processing to achieve dramatic impact.
Types of Volcanic Formations and Their Characteristics
Columnar basalt formations, like those found at Reynisfjara in Iceland or the Giant's Causeway in Northern Ireland, feature hexagonal or pentagonal columns created by the contraction of cooling lava. These geometric patterns create naturally compelling compositions and work beautifully as silhouettes or backlit subjects during sunset. The regular patterns contrast interestingly with the organic shapes of waves, clouds, and light.
Coastal lava formations, shaped by centuries of wave erosion, often feature interesting caves, arches, and sculpted surfaces. These formations work exceptionally well for sunset photography as waves can create dynamic elements, sea spray adds atmosphere, and the intertidal zone provides reflective surfaces that mirror sunset colors. The combination of static rock formations and moving water creates opportunities for both sharp action shots and smooth long-exposure images.
Lava fields and rough aa flows present different photographic opportunities, with their twisted, ropey, or jagged surfaces creating abstract patterns and leading lines. These formations work well for wide-angle compositions that emphasize scale and texture, particularly when raking sunset light creates shadows that accentuate surface details.
Light Behavior on Dark Volcanic Surfaces
Understanding how light interacts with black volcanic rock is crucial for successful sunset photography. Dark rocks absorb most light rather than reflecting it, which means they appear very dark or completely silhouetted when backlit by sunset. This characteristic can be used creatively to create dramatic silhouette compositions, but it also means that capturing detail in the rocks requires careful exposure management.
During golden hour, the low angle of sunlight creates long shadows and emphasizes texture on volcanic surfaces. This side lighting reveals details invisible in harsh midday sun, making it the ideal time to capture the intricate patterns, cracks, and formations in volcanic rock. The warm color temperature of sunset light, typically around 3000-4000 Kelvin, creates a beautiful color contrast with the neutral to cool tones of basalt.
Wet volcanic rocks, common in coastal settings or after rain, reflect light differently than dry surfaces. Water creates specular highlights, enhances color saturation, and can mirror sunset skies, adding another dimension to compositions. Timing your shoot to coincide with low tide or recent wave action can provide these reflective surfaces that add visual interest.
Essential Camera Equipment for Volcanic Sunset Photography

Photographing sunsets over black volcanic formations requires specific equipment choices that address the unique challenges of these environments. The combination of low light conditions, extreme contrast, potentially harsh coastal conditions, and the need for sharp images demands careful gear selection.
A sturdy tripod is absolutely essential for volcanic sunset photography. The low light conditions of sunset often require slower shutter speeds to maintain image quality, and a tripod eliminates camera shake while allowing you to use optimal aperture and ISO settings. Choose a tripod that can handle windy coastal conditions and is stable enough for long exposures if you plan to smooth water movement.
Camera Body and Lens Selection
Camera bodies with good dynamic range perform best in the high-contrast situations typical of sunset photography over dark rocks. Modern full-frame sensors generally offer superior dynamic range and low-light performance, though many crop-sensor cameras also produce excellent results. The ability to recover shadow and highlight detail in post-processing proves invaluable when dealing with bright skies and dark foreground rocks.
Lens selection significantly impacts your compositional options. Wide-angle lenses in the 14-24mm range allow you to capture expansive scenes, emphasize foreground rocks, and include dramatic skies. These lenses work particularly well for creating leading lines with rock formations and capturing the full scope of coastal volcanic landscapes. The wide perspective can make foreground rocks appear more dramatic and imposing.
Telephoto lenses in the 70-200mm or longer range serve important purposes in volcanic sunset photography. They allow you to compress perspective, isolate interesting rock formations against the sunset, and capture details you cannot reach physically. Telephoto compression can create striking images where the sun appears larger behind silhouetted formations, and they help simplify compositions by excluding distracting elements.
Filters and Accessories
Graduated neutral density filters prove invaluable for sunset photography over volcanic formations. These filters darken the bright sky while leaving the foreground unaffected, helping balance the extreme contrast between dark rocks and bright sunset skies. A 2-stop or 3-stop soft-edged graduated ND filter allows you to capture detail in both the rocks and the sky in a single exposure.
Standard neutral density filters enable long exposures even in relatively bright conditions, allowing you to smooth water movement, create misty effects from waves, and add motion blur to clouds. A 6-stop or 10-stop ND filter can transform choppy water into smooth, ethereal surfaces that contrast beautifully with sharp volcanic rocks.
Polarizing filters reduce reflections on wet rocks and water surfaces, enhance color saturation in skies, and can help cut through atmospheric haze. However, use polarizers carefully during sunset as they can create uneven darkening in wide-angle shots and may reduce light too much in already low-light conditions.
Protection and Safety Equipment
Volcanic coastal environments present challenges for camera equipment. Salt spray, sand, and moisture can damage gear quickly. Bring lens cleaning supplies including microfiber cloths, lens cleaning solution, and a rocket blower for removing sand and salt crystals. Rain covers or plastic bags protect cameras during unexpected spray or weather changes.
Sturdy footwear with good grip is essential for safety when climbing on volcanic rocks, which can be sharp, unstable, and slippery when wet. Bring a headlamp or flashlight for navigating terrain after sunset, and always inform someone of your location and expected return time when photographing in remote areas.
Camera Settings for Black Rock Sunset Photography

Mastering camera settings for volcanic sunset photography requires balancing exposure, depth of field, and image quality while adapting to rapidly changing light conditions. The extreme contrast between dark rocks and bright skies, combined with diminishing light levels, demands thoughtful technical choices.
Shooting in manual mode provides the control necessary for consistent exposures as light changes during sunset. Auto modes can be fooled by the dark rocks, causing overexposure of the sky, or by the bright sky, causing underexposure of the foreground. Manual mode allows you to set exposure based on the specific elements you want to properly expose and maintain consistency across multiple shots.
Aperture Selection for Maximum Sharpness
For landscape photography featuring volcanic formations, apertures between f/8 and f/16 typically provide the best balance of sharpness and depth of field. These mid-range apertures avoid the softness that can occur at wide apertures and the diffraction that reduces sharpness at very small apertures like f/22.
When you want both foreground rocks and distant elements sharp, use hyperfocal distance focusing techniques with apertures around f/11 or f/16. This maximizes depth of field from near to far. However, if you are creating silhouette compositions where foreground sharpness matters less, you can use wider apertures like f/5.6 or f/8 to maintain faster shutter speeds as light fades.
For images emphasizing texture in volcanic rocks, use smaller apertures like f/11 to f/16 and focus carefully on the rock surfaces you want to highlight. The increased depth of field ensures texture details remain sharp throughout the frame.
Shutter Speed Considerations
Shutter speed choices depend on your creative intent and available light. For sharp images of rocks with frozen wave action, use faster shutter speeds of 1/125 second or quicker. This captures the drama of waves crashing against volcanic formations with clarity and detail.
For smooth, ethereal water effects, use slower shutter speeds ranging from 1/2 second to several seconds or even minutes with ND filters. These long exposures transform turbulent water into misty, dreamlike surfaces that contrast beautifully with sharp volcanic rocks. The exact shutter speed depends on wave intensity and the degree of smoothing desired.
As light fades during sunset, shutter speeds naturally slow down. Use a tripod to maintain image quality at slower speeds rather than increasing ISO excessively. Monitor your shutter speed as light changes and adjust other settings to maintain proper exposure while achieving your creative goals.
ISO Management in Low Light
Keep ISO as low as possible (typically ISO 100-400) to maintain maximum image quality and dynamic range. Modern cameras handle higher ISOs well, but volcanic sunset photography benefits from the cleanest possible files given the extreme contrast and need for shadow recovery.
As light diminishes, you may need to increase ISO to maintain adequate shutter speeds, particularly if shooting handheld or capturing wave action. Most modern cameras produce usable images at ISO 800-1600, and even higher if necessary. The trade-off between noise and capturing the shot favors getting the image, as noise reduction in post-processing has become very effective.
Consider using auto ISO with maximum limits set to ISO 1600 or 3200, allowing the camera to adjust ISO while you control aperture and shutter speed. This provides flexibility as light changes rapidly during sunset while preventing ISO from climbing too high.
White Balance and Color Temperature
White balance significantly affects the mood and color rendition of sunset images. While shooting in RAW format allows white balance adjustment in post-processing, setting an appropriate white balance in-camera helps you visualize the final image and ensures accurate LCD previews.
Daylight or sunny white balance settings (around 5200-5500K) preserve the warm tones of sunset, creating rich oranges and reds in the sky. Cloudy or shade settings (6000-7000K) add even more warmth, intensifying sunset colors. Avoid auto white balance, which may try to neutralize the warm sunset tones you want to capture.
For more creative control, use Kelvin white balance settings to precisely dial in color temperature. Settings between 4500K and 6500K work well for sunset photography, with lower values creating cooler images and higher values producing warmer tones. Experiment with different settings to find the look that best suits your vision.
Composition Techniques for Volcanic Sunset Landscapes

Strong composition transforms technically correct photographs into compelling images that capture viewers' attention and convey the drama of volcanic landscapes at sunset. The unique characteristics of black volcanic formations—their dark tones, interesting shapes, and textures—provide excellent compositional elements when used thoughtfully.
The rule of thirds provides a reliable starting point for composing volcanic sunset images. Place the horizon on the upper or lower third line depending on whether the sky or foreground rocks are more interesting. Position prominent rock formations at intersection points to create visual interest and balance. However, don't be afraid to break this rule when symmetrical compositions or other arrangements better serve your creative vision.
Foreground Interest and Leading Lines
Black volcanic rocks excel as foreground elements, providing visual weight and anchoring compositions. Use wide-angle lenses to emphasize foreground rocks, making them appear larger and more dramatic while still including the sunset sky. Get low to the ground to make foreground elements more prominent and create a sense of immersion in the landscape.
Look for natural leading lines in volcanic formations—cracks in the rock, rows of basalt columns, wave-carved channels, or patterns in lava flows—that guide the viewer's eye through the image toward the sunset or other focal points. These lines create depth and visual flow, making compositions more engaging than static arrangements.
Layer your compositions with foreground rocks, mid-ground elements like waves or additional formations, and background sunset skies. This layering creates depth and dimension, preventing images from appearing flat. Each layer should contribute to the overall composition without creating visual clutter.
Silhouette and Backlighting Techniques
The extreme contrast between dark volcanic rocks and bright sunset skies naturally lends itself to silhouette photography. Position yourself so that rocks are between your camera and the sunset, then expose for the bright sky. This renders the rocks as dark shapes against the colorful background, emphasizing their forms and creating dramatic, graphic images.
For effective silhouettes, choose rock formations with interesting, recognizable shapes. Jagged peaks, arches, columns, or unique formations work better than amorphous blobs. The shape should be distinct enough to be identifiable even without detail. Position formations so they don't merge into indistinct masses.
Partial silhouettes or rim lighting occurs when some light catches the edges of volcanic formations, creating a bright outline around dark shapes. This technique combines the drama of silhouettes with some texture and detail, often creating more three-dimensional images than pure silhouettes. Position yourself at an angle where sunset light grazes the edges of formations.
Reflections and Symmetry
Wet volcanic rocks and tidal pools create opportunities for reflections that double the visual impact of sunset colors. After waves recede or in calm tidal pools, smooth water surfaces mirror the sky, creating symmetrical compositions. Position your camera low and close to reflective surfaces to maximize the reflection's prominence.
Perfect symmetry with the horizon centered in the frame creates powerful, balanced compositions when reflections are strong. However, imperfect reflections with some asymmetry can also work well, creating more dynamic images. Experiment with different horizon placements to find the most compelling arrangement.
Use slow shutter speeds to smooth water surfaces and enhance reflections, or faster speeds to capture the moment when water creates mirror-like surfaces between waves. The choice depends on water conditions and your creative intent.
Timing and Light: Maximizing Golden Hour and Blue Hour

Understanding the progression of light during sunset and planning your shoot accordingly proves crucial for capturing the best volcanic rock images. The quality, direction, and color of light changes rapidly during golden hour and blue hour, each phase offering different photographic opportunities.
Golden hour, the period roughly one hour before sunset when the sun sits low in the sky, provides warm, directional light that emphasizes texture and creates long shadows. This light rakes across volcanic formations, revealing details invisible in harsh midday sun. The warm color temperature creates beautiful contrast with the cool tones of basalt.
Pre-Sunset Preparation and Scouting
Arrive at your location at least 90 minutes before sunset to allow time for scouting compositions, setting up equipment, and capturing early golden hour light. Rushing to set up as the sun sets causes you to miss the best light and often results in poorly considered compositions.
Scout locations during daylight to identify interesting rock formations, safe access routes, and potential compositions. Note where the sun will set relative to the formations using apps like PhotoPills or The Photographer's Ephemeris. This planning allows you to be ready when optimal light arrives rather than searching for compositions in fading light.
Check tide tables for coastal volcanic locations, as tide levels dramatically affect which formations are accessible and how waves interact with rocks. Low tide often exposes interesting formations and creates tidal pools for reflections, while high tide brings dramatic wave action. Plan your visit to coincide with the tide state that best suits your photographic goals.
During Sunset: Adapting to Changing Light
As sunset progresses, light intensity decreases rapidly, requiring constant exposure adjustments. Monitor your histogram and LCD screen, adjusting shutter speed, aperture, or ISO to maintain proper exposure. Bracket exposures to ensure you capture the full dynamic range as contrast increases.
The character of light changes throughout sunset. Early golden hour provides bright, warm light ideal for capturing rock texture and detail. As the sun approaches the horizon, light becomes softer and more directional, creating dramatic shadows and silhouettes. After the sun dips below the horizon, the sky often explodes with color during the afterglow period, providing spectacular backdrops for silhouetted formations.
Don't pack up immediately after sunset. Blue hour, the period of twilight after sunset when the sky takes on deep blue tones, often provides the most dramatic light for volcanic rock photography. The combination of blue sky, lingering sunset colors on the horizon, and dark rock formations creates moody, atmospheric images. Blue hour typically lasts 20-40 minutes after sunset, depending on latitude and season.
Post-Sunset and Blue Hour Opportunities
Blue hour requires longer exposures as light continues to fade, making a tripod essential. Exposures may range from several seconds to minutes depending on light levels and desired effects. This low light creates opportunities for creative long-exposure techniques that smooth water, blur clouds, and create ethereal atmospheres.
The color contrast between warm artificial lights (if any are present) and cool blue twilight creates interesting color dynamics. Even without artificial lights, the subtle color variations in the twilight sky—deep blues, purples, and lingering oranges—provide rich palettes for volcanic rock photography.
Use the extended exposure times of blue hour to experiment with different shutter speeds and their effects on water movement. Compare images at 1 second, 5 seconds, 30 seconds, and longer to see how motion blur affects the mood and composition.
Post-Processing Techniques for Volcanic Sunset Images

Post-processing enhances the dramatic potential of volcanic sunset photographs while maintaining natural appearance. The goal is to bring out the best in your images—revealing detail in dark rocks, balancing extreme contrast, and enhancing colors—without creating artificial or oversaturated results.
Working with RAW files provides maximum flexibility for adjusting exposure, recovering highlights and shadows, and fine-tuning colors. JPEG files limit your ability to make significant adjustments without quality loss. Always shoot RAW for volcanic sunset photography given the challenging lighting conditions.
Exposure and Contrast Adjustments
Begin post-processing by addressing exposure and contrast. Volcanic sunset images often benefit from lifting shadows to reveal detail in dark rocks while maintaining their dark character. Use shadow and blacks sliders carefully to avoid making rocks appear unnaturally light or gray.
Recover highlight detail in bright skies using highlight recovery tools, being careful not to create halos or unnatural transitions. The goal is balanced exposure where both rocks and sky retain detail and visual interest. Graduated filters or radial filters can help balance exposure between sky and foreground when global adjustments prove insufficient.
Apply contrast adjustments thoughtfully. Moderate contrast increases can enhance the drama of volcanic formations and sunset skies, but excessive contrast creates harsh transitions and loses detail. Use tone curves for precise contrast control, creating gentle S-curves that enhance midtone contrast while protecting shadows and highlights.
Color Enhancement and White Balance
Adjust white balance to achieve the mood you envision. Slightly warmer color temperatures enhance sunset drama, while cooler temperatures create more moody, atmospheric images. Avoid extreme color temperature shifts that make images look unnatural.
Enhance color saturation and vibrance selectively. Vibrance increases saturation of muted colors while protecting already-saturated tones, making it ideal for sunset photography. Use saturation adjustments sparingly to avoid oversaturated, garish colors. Target specific color ranges using HSL (hue, saturation, luminance) controls to enhance oranges and reds in the sky while maintaining natural appearance.
Consider split toning to add subtle color casts to shadows and highlights. Adding slight warmth to highlights and coolness to shadows can enhance the natural color dynamics of sunset over volcanic rocks. Use this technique subtly to avoid artificial-looking results.
Local Adjustments and Sharpening
Use local adjustment tools like graduated filters, radial filters, and adjustment brushes to enhance specific areas of your images. Darken overly bright sky areas, brighten shadowed rock formations, or enhance color in specific regions. These targeted adjustments provide control impossible with global adjustments alone.
Apply sharpening to enhance texture in volcanic rocks, being careful not to oversharpen and create halos or noise. Use masking controls to limit sharpening to edges and textures rather than smooth areas like skies. Apply sharpening as the final step after other adjustments.
Reduce noise if necessary, particularly in images shot at higher ISOs during blue hour. Modern noise reduction tools effectively remove noise while preserving detail. Balance noise reduction with detail preservation, accepting some noise rather than creating plasticky, over-smoothed results.
Safety Considerations for Volcanic Coastal Photography

Photographing sunsets over volcanic formations, particularly in coastal settings, involves real risks that require careful attention and preparation. The combination of unstable terrain, powerful waves, slippery surfaces, and the distraction of pursuing good light creates hazards that have injured or killed photographers.
Volcanic rocks, especially coastal formations, can be extremely sharp and unstable. Basalt formations may have jagged edges that can cause serious cuts if you fall. Always wear sturdy footwear with good ankle support and grippy soles. Test rocks for stability before putting your full weight on them, and avoid climbing on formations that appear loose or weathered.
Wave and Tide Awareness
Coastal volcanic locations present significant wave hazards. Sneaker waves can sweep across rocks without warning, knocking photographers off their feet and dragging them into the ocean. Never turn your back on the ocean, and always maintain awareness of wave patterns and your escape routes.
Study tide tables before your shoot and understand how tide levels affect the area you are photographing. Incoming tides can cut off escape routes or trap you on rocks that were accessible at low tide. Plan to finish shooting and begin your exit well before high tide arrives.
Position yourself well back from the water's edge, even when waves appear to be breaking safely offshore. Wave heights and power can change suddenly, and what seems like a safe distance can become dangerous quickly. When in doubt, move farther back from the water.
Weather and Environmental Hazards
Coastal weather can change rapidly, with fog rolling in, winds increasing, or storms developing quickly. Monitor weather forecasts and be prepared to abandon your shoot if conditions become dangerous. No photograph is worth risking your life.
Bring appropriate clothing for changing conditions including windproof and waterproof layers. Hypothermia can develop quickly if you get wet in cold, windy conditions even in relatively mild temperatures. Dress in layers you can adjust as conditions change.
Carry a headlamp or flashlight with fresh batteries for navigating terrain after sunset. What looks like a straightforward path in daylight can become treacherous in darkness. Give yourself plenty of time to pack up and exit safely before complete darkness falls.
Equipment Protection and Emergency Preparedness
Protect your equipment from salt spray, sand, and moisture. Use lens hoods to minimize spray on front elements, and clean your gear promptly after shooting in coastal environments. Bring lens cleaning supplies and microfiber cloths to remove salt and moisture.
Carry a basic first aid kit including supplies for treating cuts and scrapes common when navigating sharp volcanic rocks. Bring a fully charged mobile phone for emergencies, though don't rely on having signal in remote areas. Inform someone of your location and expected return time when shooting alone.
Consider carrying a personal locator beacon or satellite messenger when photographing in remote volcanic areas without reliable cell coverage. These devices can summon emergency help if you are injured or trapped, potentially saving your life in serious situations.
Conclusion: Mastering the Art of Volcanic Sunset Photography

Photographing sunsets over black volcanic rock formations combines technical skill, creative vision, and respect for nature's power. The dramatic contrast between dark geological formations and vibrant sunset skies creates images of striking beauty that reward photographers willing to master the unique challenges these environments present.
Success in this genre requires understanding how light interacts with dark volcanic surfaces, mastering camera settings for extreme contrast situations, composing thoughtfully to emphasize the drama of these landscapes, and timing your shoots to capture the best light from golden hour through blue hour. Technical proficiency must be balanced with creative vision and unwavering attention to safety.
As you develop your skills photographing volcanic sunsets, remember that each location offers unique opportunities and challenges. Study the formations, understand the light, respect the power of coastal environments, and remain patient as you wait for the perfect moment when all elements align. The images you create will not only showcase the beauty of these remarkable geological formations but also document your journey as a photographer learning to see and capture the extraordinary interplay of light, rock, and time.
0 Comments